One of the joys of lockdown has been discovering the Gilmore Girls. I don’t know if I was living under a rock or maybe it wasn’t that big a deal in the UK but I hadn’t even heard much about it. Once I started watching it I quickly realised that this show is a crochet gem! So far I’ve spotted sofa blankets, scarfs, hats, head scarfs, skirts and jumpers. And I want to make them all!
Stars Hollow
Gilmore Girls is set in Connecticut in the small fictitious town of Stars Hollow. I have to be honest, aside from the crochet, the town set is one of my favourite parts of the show. I love to watch them walk around while I make mental notes of where all the buildings are in relation to the town square.
The Gilmore Girls set has since been used in other productions so unfortunately there are no set props. I don’t watch Pretty Little Liars but I believe several scenes were filmed here.
You can start your virtual tour in the town square and have a wonder around from there trying to work out where all your favourite buildings are but if you get into trouble finding somewhere I’ve got some pointers below.
Lorelai and Rory’s house might be hard to find unless you already know a little secret about it. Sooki and Lorelai’s houses are the same house! To see the Gilmore Girls house take a walk through Sooki’s house! Yes that’s right, you can take a virtual tour inside the Gilmore Girls house! There are several other buildings you can look around too, Mrs Kim’s antique shop, which incidentally is also Emily’s house exterior in Pretty Little Liars, the highschool, where Rory and Dean meet, the church, and Doose’s Market.
Unfortunately we can’t go inside Luke’s dinner but we can walk around the exterior. The dinner has been repainted for Pretty Little Liars. Across from the dinner is Miss Patty’s dance studio and the location for all of those town meetings. Next door to the studio is where we would occasionally see Lorelai pick up a magazine or newspaper and maybe a little bit of gossip. Across from the newsstand is Weston Bakery. From the side entrance of the highschool look across the road and you’ll see the garage where Luke stored his boat, next door to the garage is Lane and the bands apartment.
The location of Gypsies garage had me stumped for a while, we can always see the square when we see scenes at the garage yet I never seemed to notice the garage during scenes in the square. Eventually I realised it’s behind Mrs Kim’s house and the church. The music shop is down the little side street next to Doose’s market. And lastly to find the Stars Hollow Gazette look out for the open red door.
Crochet Blankets
Now, moving onto the Gilmore Girls crochet blankets!
There are several crochet blankets featured throughout the seven seasons and they all have a cosy homemade feel to them.
Lorelai, Mrs Kim and Sooki’s blankets are either draped over furniture or used to snuggle up on the sofa with.
The first crochet blanket I noticed on the Gilmore Girls is the black trimmed granny square blanket folded over the back of some furniture in Mrs Kim’s antique shop. We see another of these blankets in Babettes house.
My favourite crochet we see Sooki use are a three tone pink harlequin stitch blanket and a green granny square headscarf.
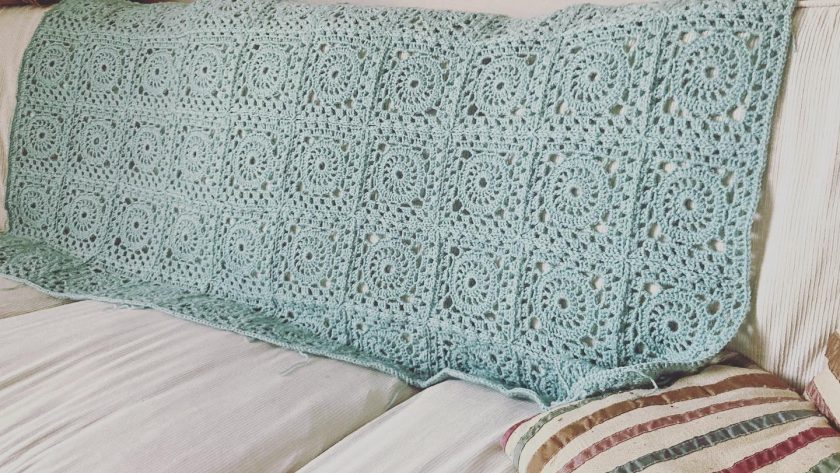
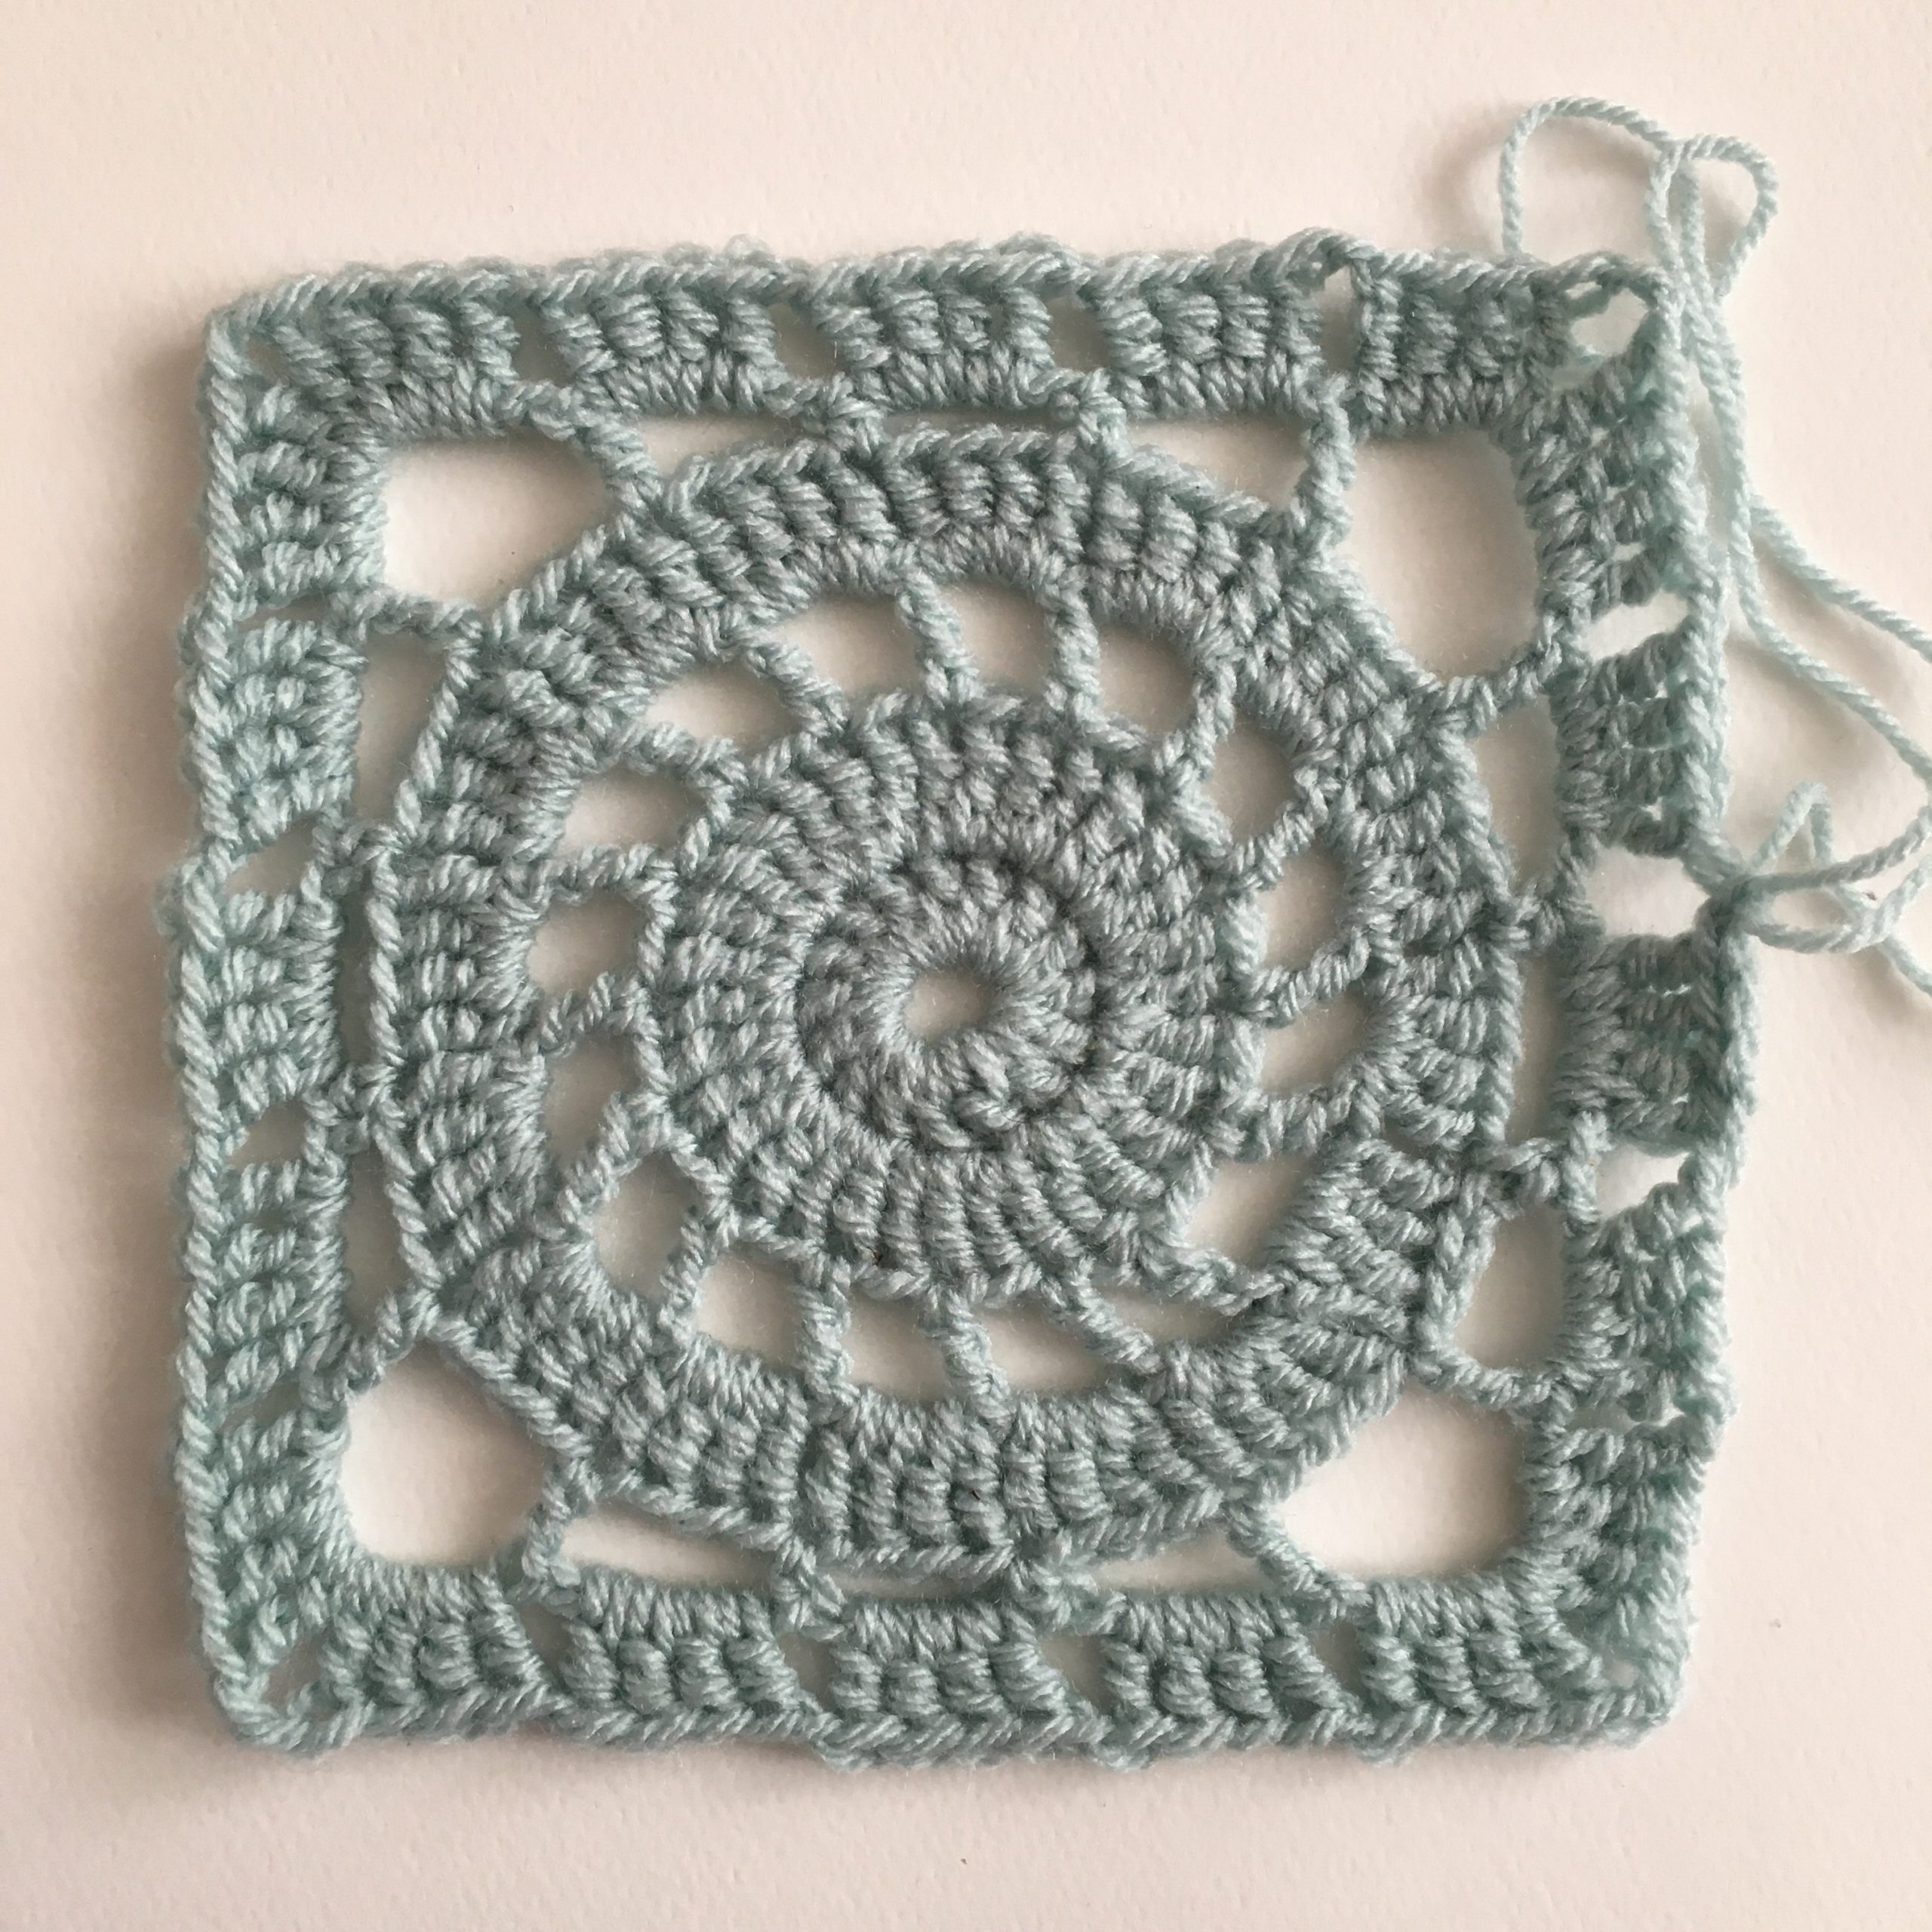
The Blue Blanket
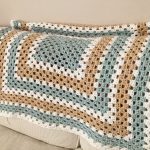
I think all Gilmore Girls fans who crochet have spotted the blue blanket on the back of Lorelai and Rory’s sofa! Initially I tried to find a pattern for the blue blanket but have so far only found corner to corner tribute blankets or blankets inspired by but not the same as the blue blanket. I decided I’d have a go at creating something similar myself. To begin recreating this blanket I searched google and photographed stills from the telly.
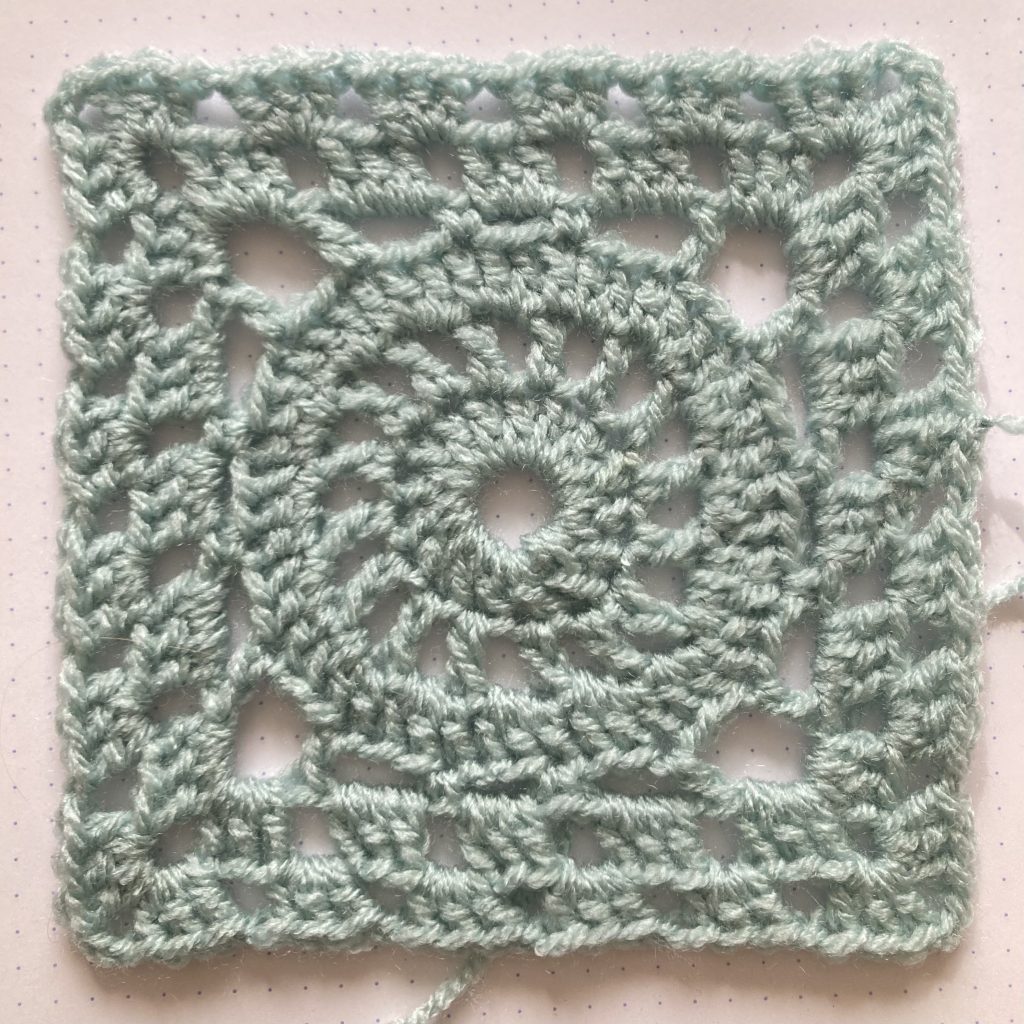
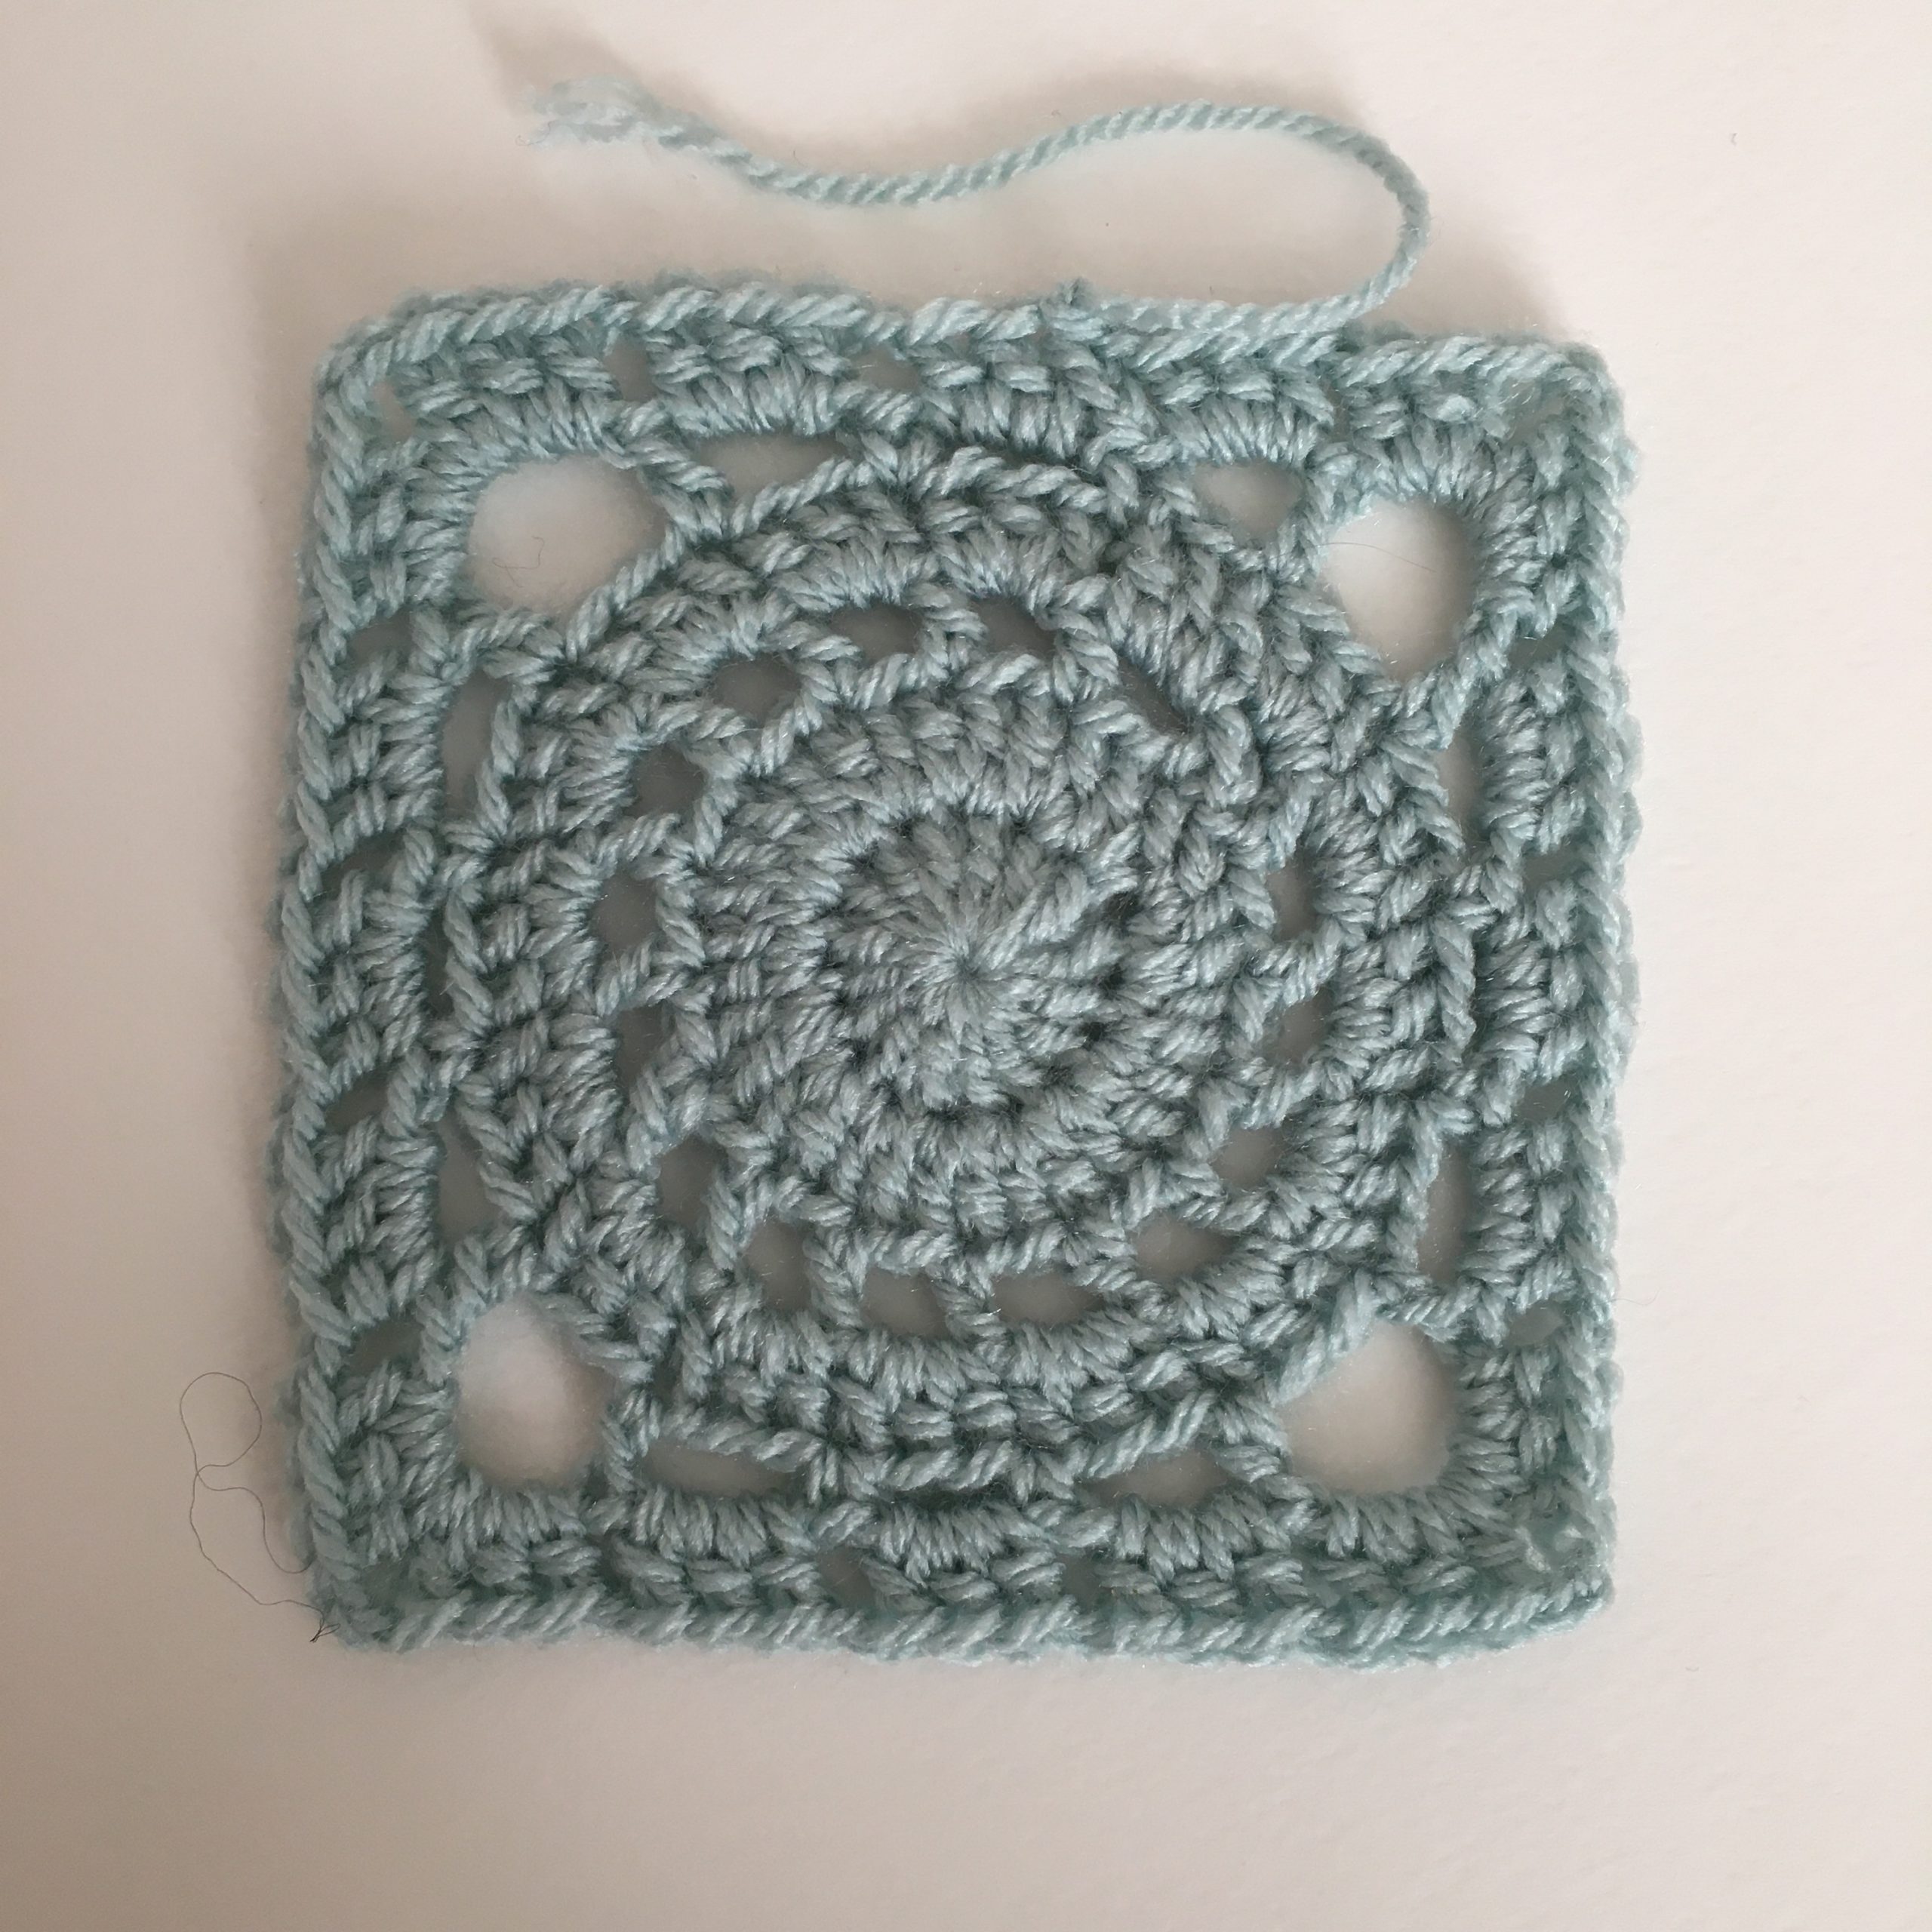
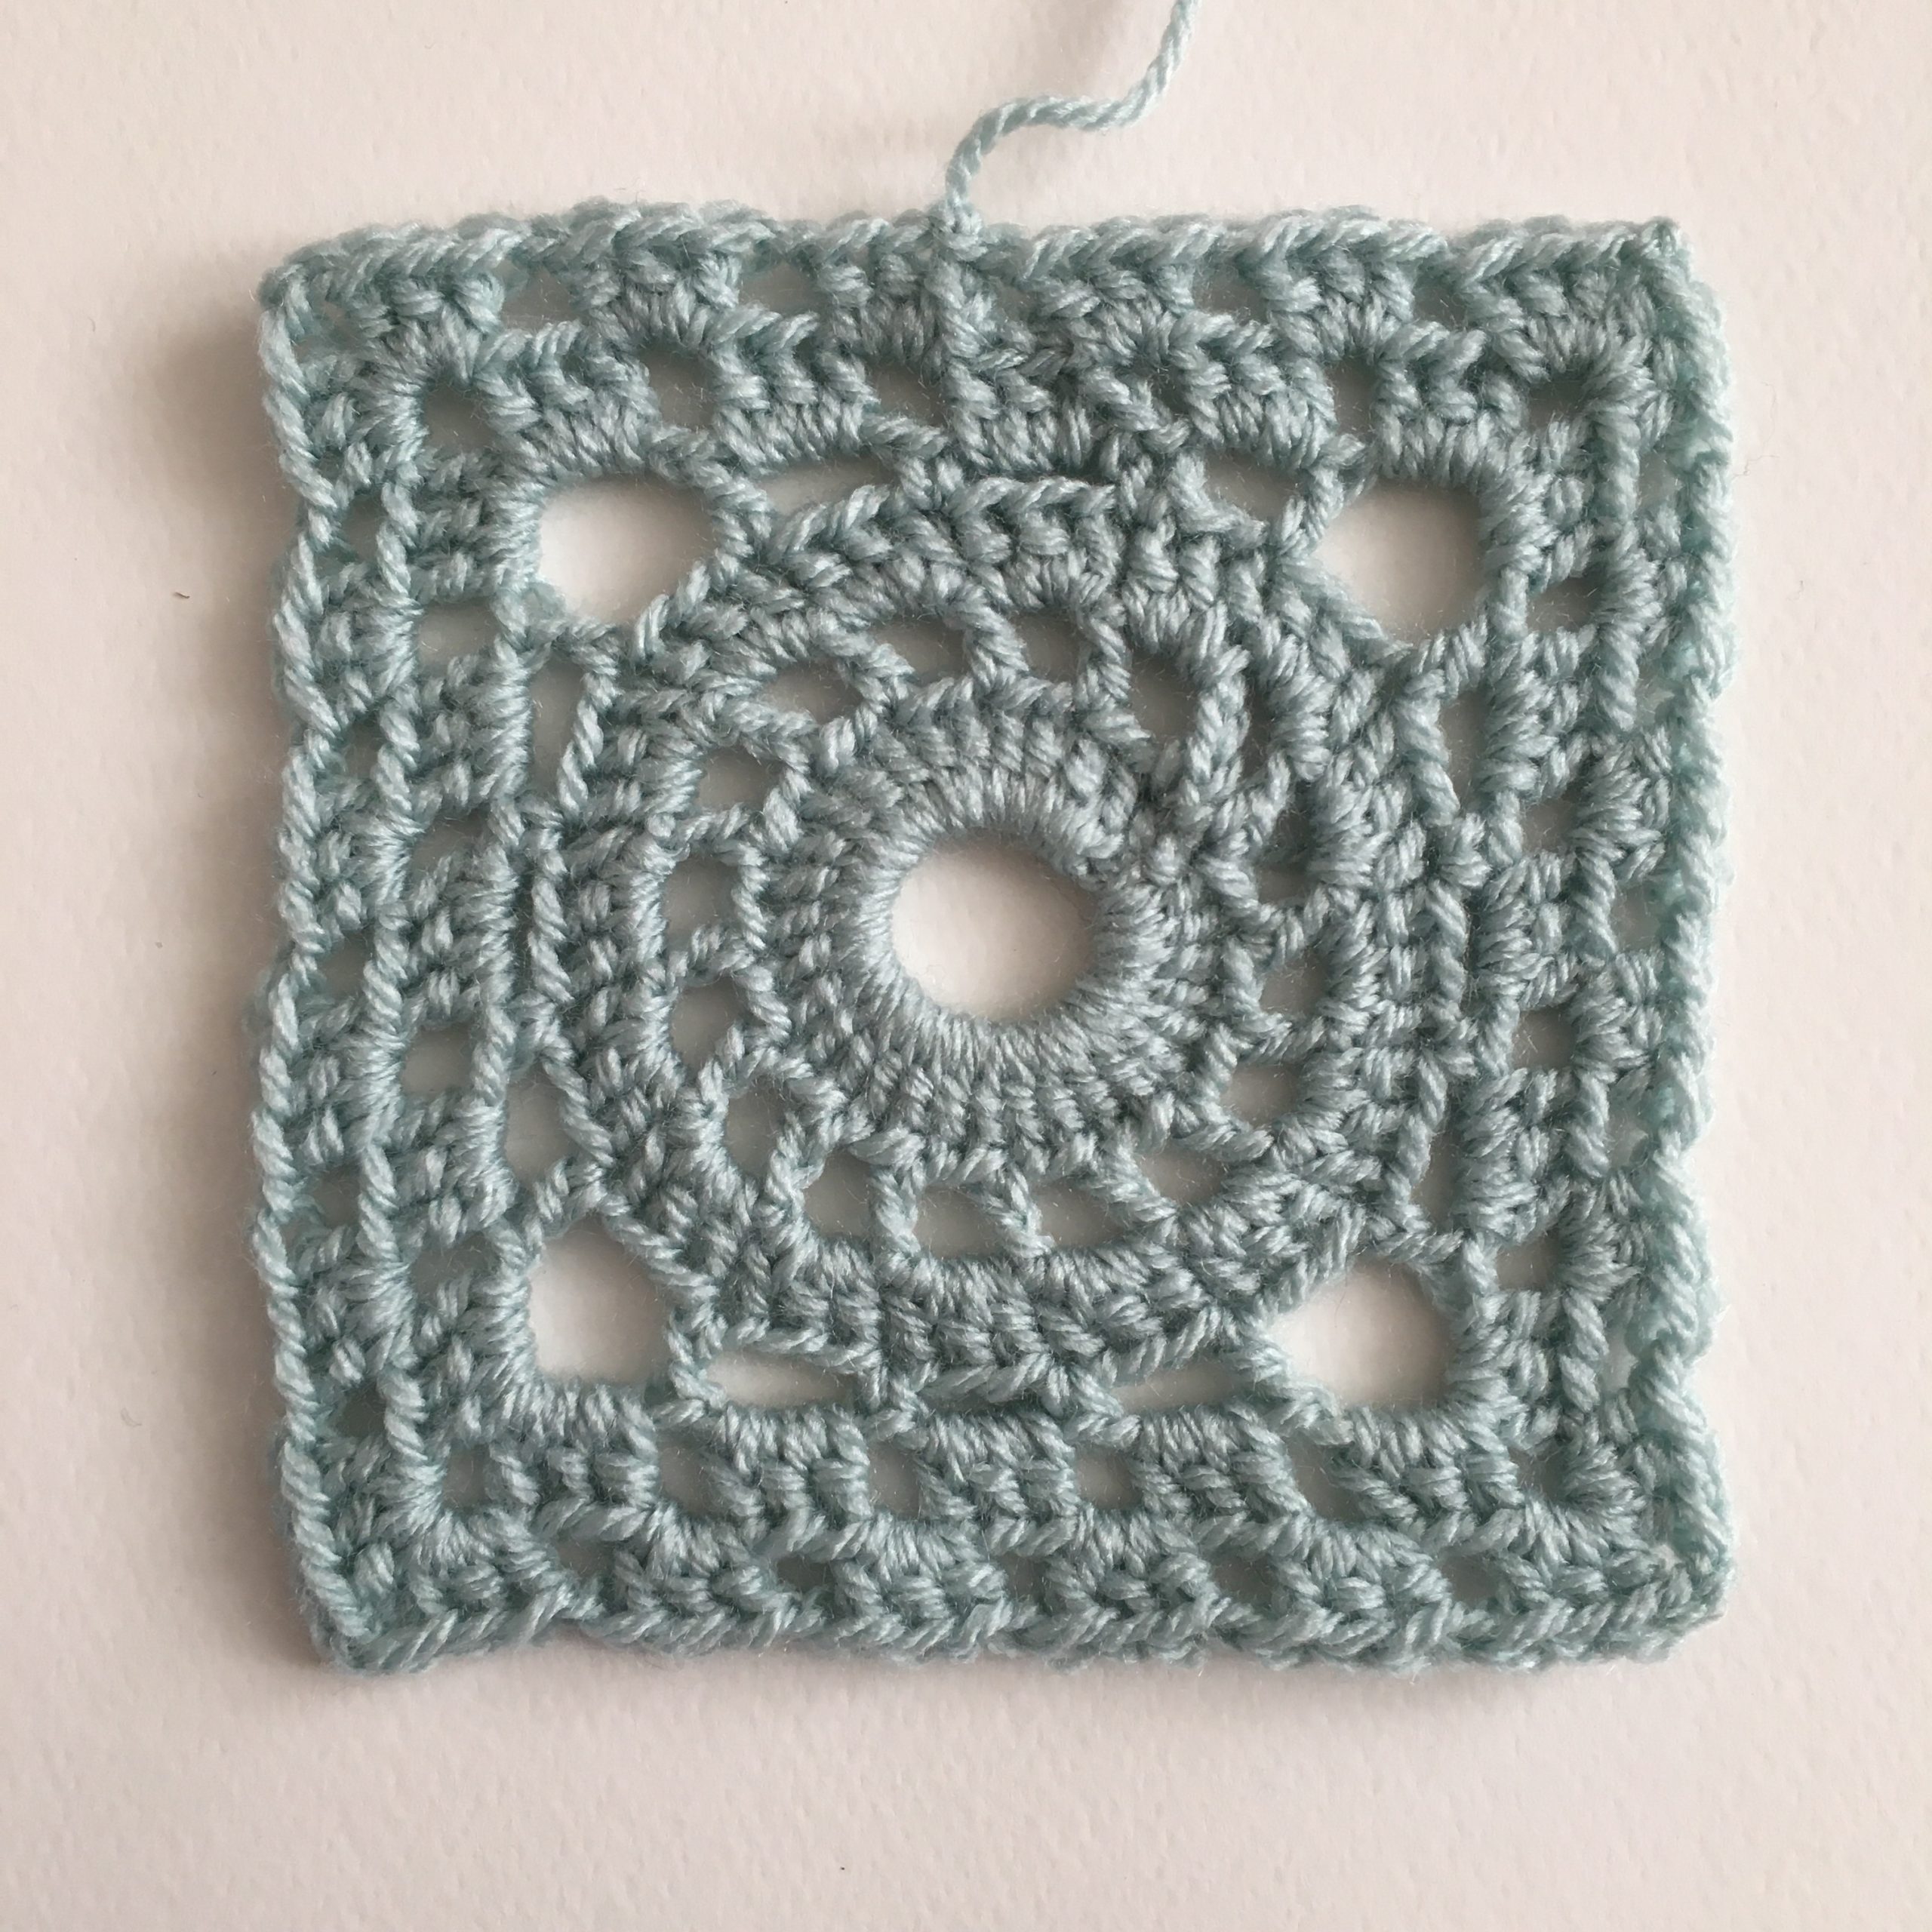
What we know from visually studying the blanket photos:
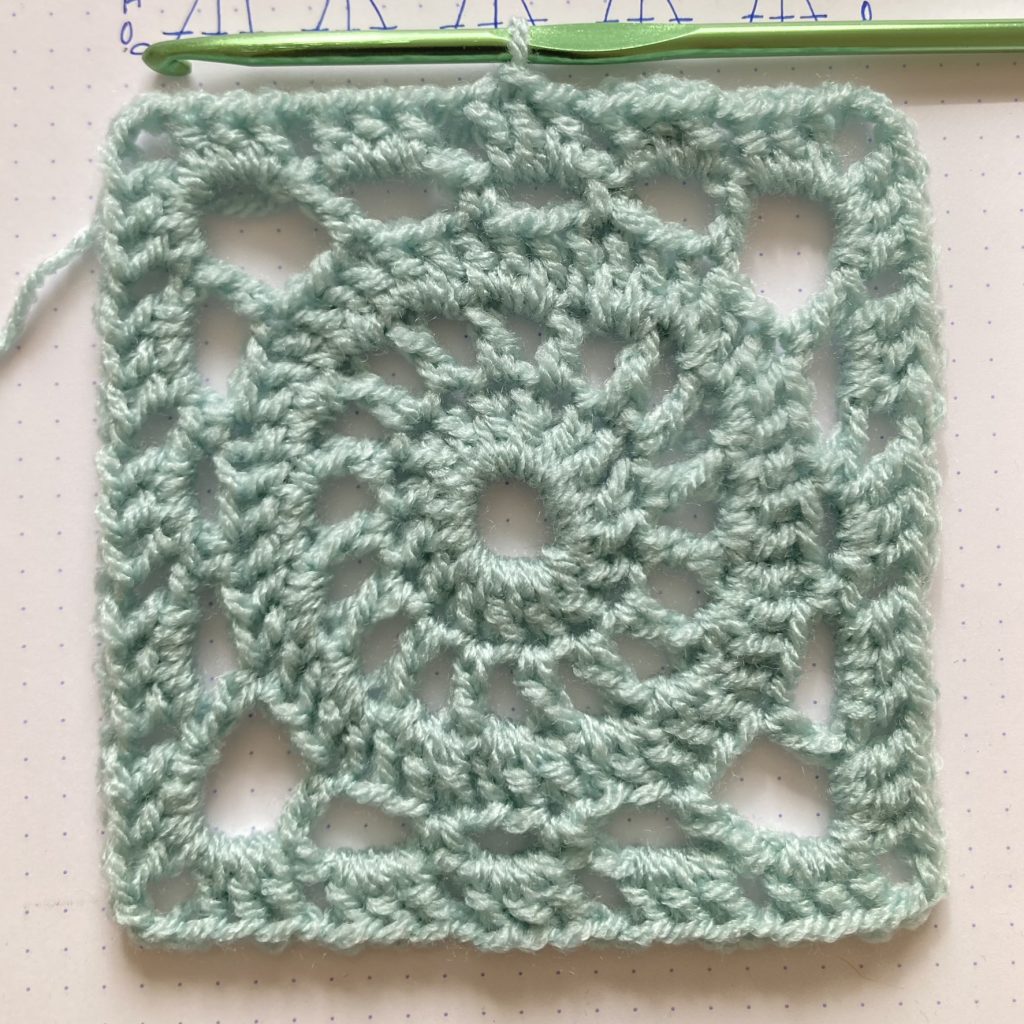
• it’s a patchwork blanket of granny squares.
• the granny squares are one design repeated.
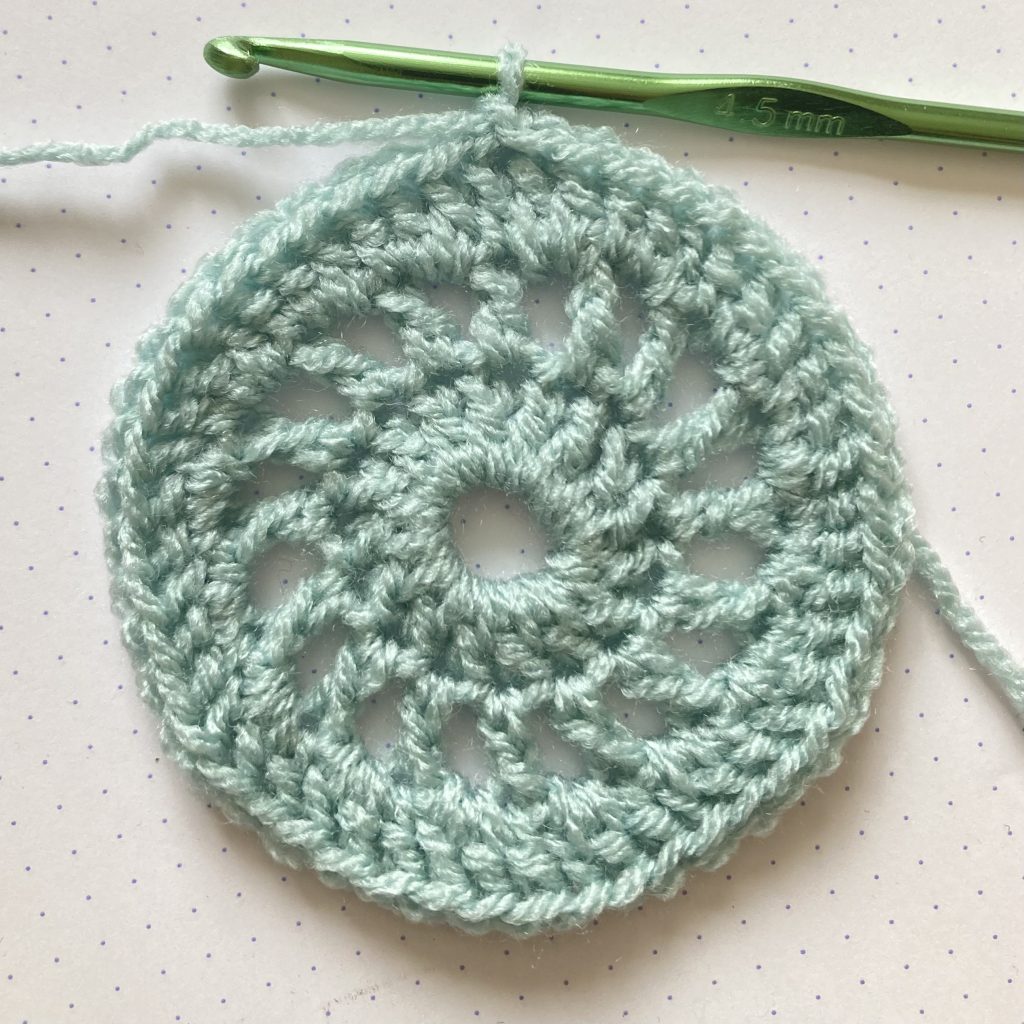
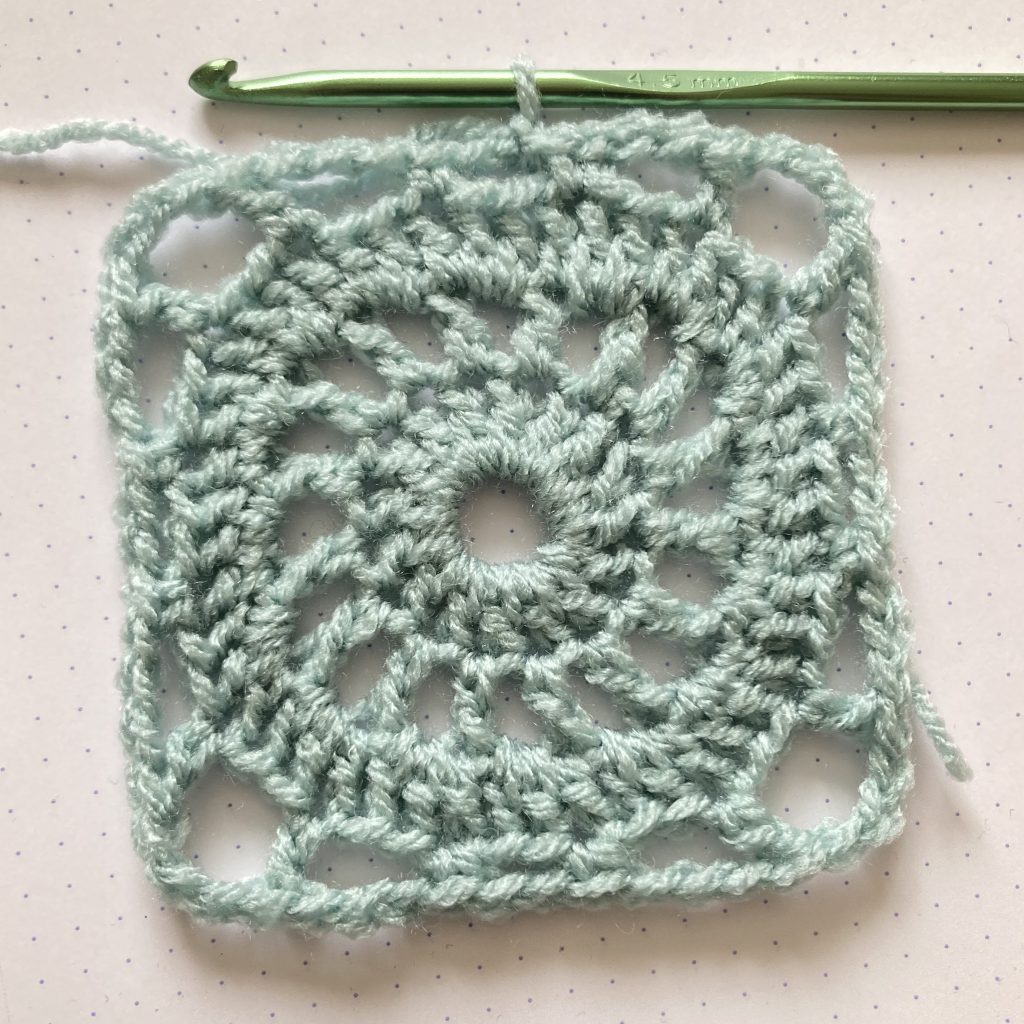
• the design has a circle within a square.
• The squares have a join-as-you-go granny stitch join.
• The joins are 6 groups of granny square stitch per square.
• The last round of each square is 5 groups of granny square stitch.
• We can count 16 spokes between two solid circle sections.


This is really pretty! Thank you for the tutorial.
You’re very welcome 💛
Love this pattern – we love Gilmore Girls. I do so much better with a tutorial like YouTube. Do you have one.? Also what is this pattern called. Thanks.
Hi, thank you for your comment. Yes I have a YouTube video for this pattern https://youtu.be/bb56LwaFp5w
It’s called the Lorelai Square
Sam x
Thank you ! I’m a huge fan of this show. I’m still looking for the pattern for the Rory’s crochet white scarf.
Hi thank you for the pattern! I ‘discovered’ the show during the pandemic as well. How many squares altogether? Looks like 10 across but I wasn’t sure if it’s 10×10 square (so a bit smaller than 60” square?). Thanks again. I have 3 squares done so far. . .
Hi Midori, Thanks for your comment. I made 10×7 making 70 squares altogether, but if I had more yarn I would have made 10×14!
I was a little confused with round four I was following you on your YouTube channel and you have a chain to after you did a single crochet but in the pattern you have three and then in the corner in the pattern you have chain five but on the video you change three I think I’ll just follow the written pattern but the pattern is awesome thank you…
Hi Kathy, thanks for your comment. The pattern in the video is a smaller version of the written pattern here in the blog so yes they are different, well spotted!